3. Examples
To help your kick off in understanding these basics I created some examples, which cover typical challenges in image manipulation.
3.1. Release Objects from their background
Frequently you have existing images, where your target object is in front of an unfortunate background. You have to release the object from its original background when you want to replace the latter with a better one.
3.2. Carnivore attack
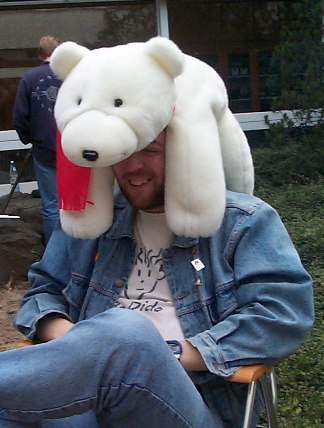
Plush-bear attack!
In the first example we see a friend under a carnivore attack. Unfortunately everybody is able to recognize this image as a fake, because in the background the courtyard of the University of Siegen is visible. Another person is standing there quite unimpressed – the illusion of a severe attack is gone. We have to place this happening before a different background to make it more credible.
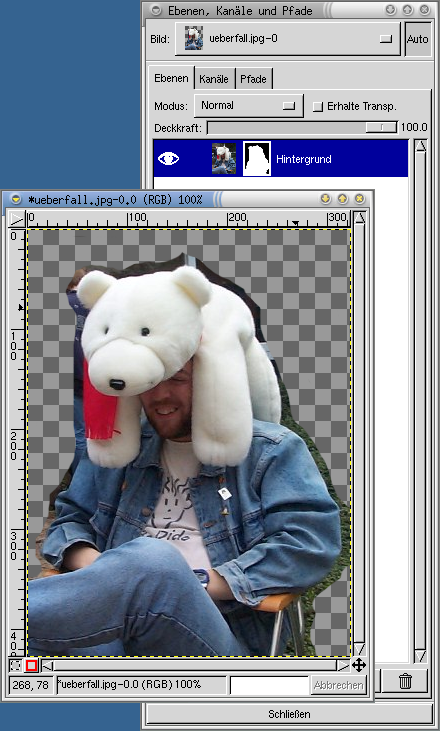
Releasing the motif with a layer mask
Open the Layers, Channels & Paths dialog and use the context menu to add an alpha channel to the image. Subsequently add a layer mask to the layer, initialize it with full white, so that the whole image remains visible. Select black as foreground color, click on the layer mask preview to ensure that we are actually painting in the mask (and not in the original image), and paint over the background to make it transparent.
When working on finer details it is very helpful to use <Image>/View/Zoom in to zoom into the image. Sometimes it may also be helpful to use a fuzzy brush to ensure a smooth transition between the target object and the background.
Sometimes the checkered background – representing transparency – disturbs when you want to judge the quality of a transition. It helps to add a black and a white layer beneath the object and use them to determine if there are stains in the mask or if you are close enough to the border of the object. When you happened to erase too much of the object you can simply paint in the mask with white to restore the original – or use undo, but that is boring :-).
Then search for an image of the arctic and place it beneath the bear: looks like an action shot from a movie...
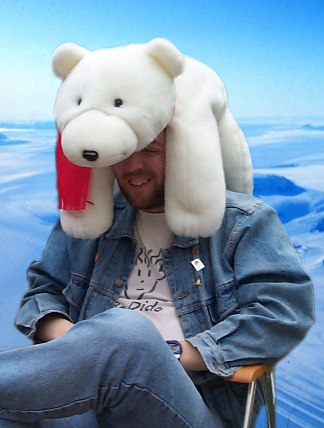
Here the bear feels at home...
3.3. Quicker with selections?
Fiddling around with the paintbrush sometimes is a little bit time consuming. The rough work can be done with selecting larger areas with the freehand tool. Especially when the target object has a sharp contrast against the background, the magic wand can be used to select connected areas of the background. To do this you have to click on the preview of the actual layer or else the magic wand will select an area based on the content of the layer mask, which is most probably not the desired thing... Then switch back to the layer mask and fill the selected area with black.
When using this method you have to judge the result against a black and a white background, because there is a high probability that you have to correct some errors.
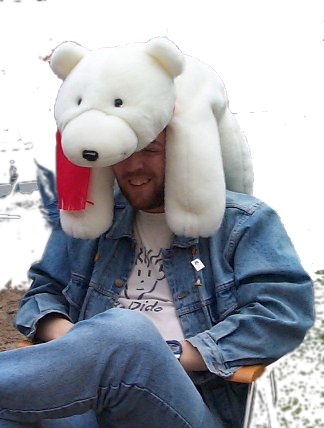
Selection tools like the magic wand can accelerate the task of releasing an object. But mostly you have to fix the mask afterwards.
3.4. Enlightening his holiness...
The bezier tool can also be really helpful to release objects with complex shapes.
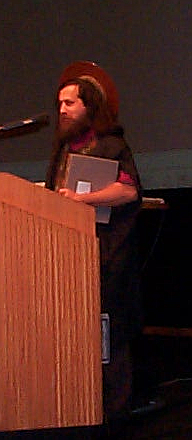
St.ĀIgnucius live
Our second example shows the holy St.ĀIgnucius on his mission at the first Wizards of OS conference in Berlin. The background elates with a great noisy silver screen.
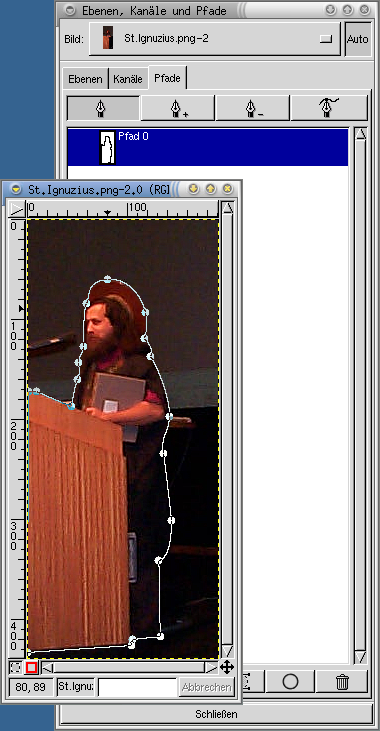
The boundaries of St.ĀIgnucius traced with a path
By surrounding the person with a path, converting the path to a selection and inverting the selection I was able to eliminate the background. To embed the person in a heavenly scene is left as an exercise to the reader :-).
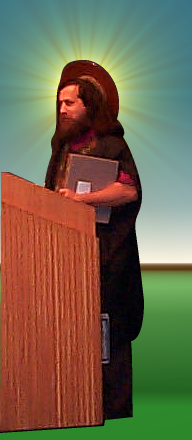
St.ĀIgnucius in a more adequate environment
3.5. Top-Secret: new species of flying fish discovered!
You can have great fun with collages. Up to now it has not yet been made public, that the NASA endangers a rare species of flying fish with their space shuttle starts. We now want to construct the proof for this.
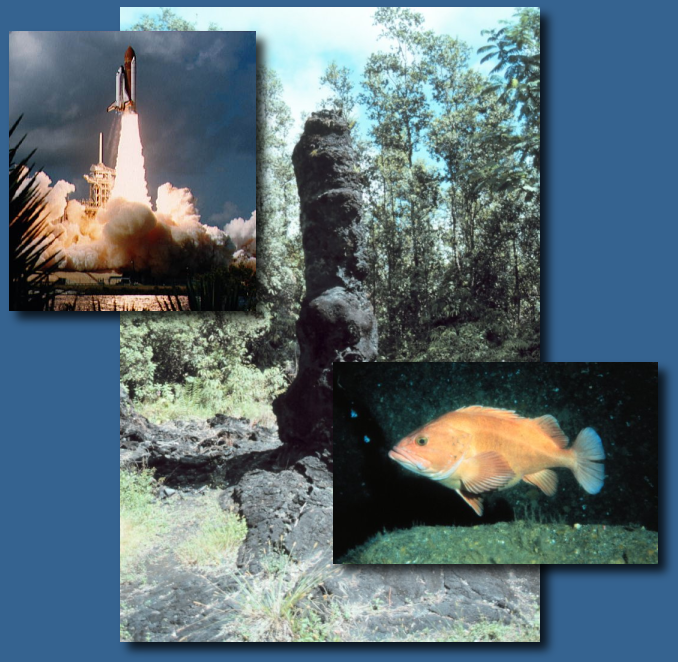
The raw material for our collage
Our Image is based on three components: A strange landscape, a fish and the space shuttle. Fish and space shuttle have to be released, so that they can be integrated in the landscape, which serves as the basis of the image. Open the image with the landscape and copy the fish as a separate layer in the image – the easiest way to do this is dragging the preview of the fish onto the window with the landscape.
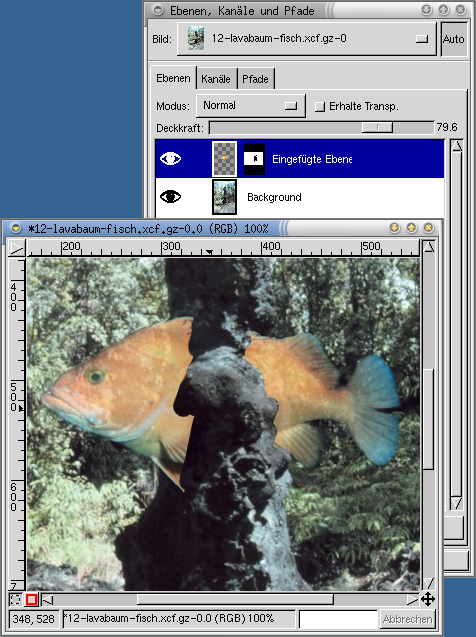
Making the fish transparent over the pillar using a layer mask
Now place the fish above the lava pillar. The fish should be behind the pillar, to get more depth in the image. Add a layer mask to the layer with the fish and paint black on the areas, where the pillar should be visible. You can assign a base transparency to the layer with the fish in the upper part of the dialog, so that you can see through the fish to ease detection of the boundaries of the pillar. Here you can also easily correct errors by painting white on these areas where the fish should be visible.

This montage shows the shuttle before its own layer mask. A black white gradient removes the clouds, black strokes remove the tower, the random confetti strokes make some forest visible in front of the shuttle.
The shuttle is a bit more problematic, because the clouds from the lift off are annoying. Basically you do the same as with the fish, but the layer mask gets tweaked a little bit more. First we use the transform tool to rotate the shuttle, so that it speeds across the heaven. Then we create a layer mask and fill it with a black white gradient, so that the exhaust gas becomes invisible towards the rear. To move the shuttle behind the trees (and does not look like a remote controlled toy) we make it additionally transparent with an irregular brush (I used confetti).
As the last but one goodie we create a shadow for the fish. Considering the position of the sun and the structure of the ground we create some strokes parallel to the shadow of the pillar with the airbrush and a fuzzy brush.
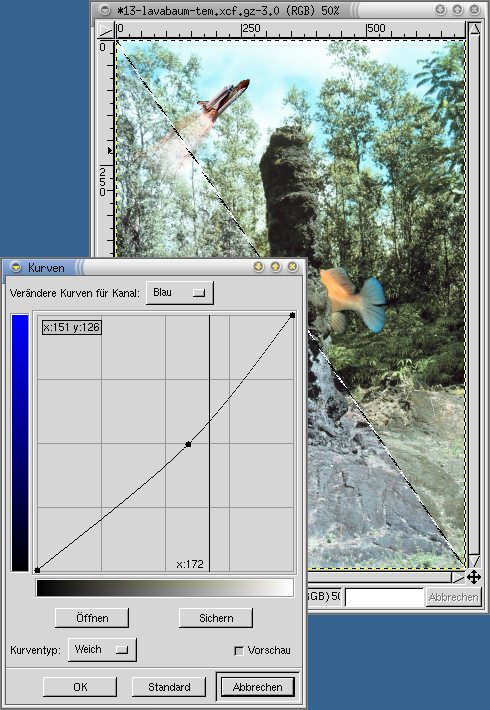
accentuating the green of the trees
To polish the image we make the landscape a bit more green. Activate the layer with the landscape and open the curves dialog via <Image>/Image/Colors/Curves.... Since our image is very bright we can reduce the blue channel to make the landscape look more greenish. Select the blue channel in the dialog, move the curve down a bit until the landscape looks just right.
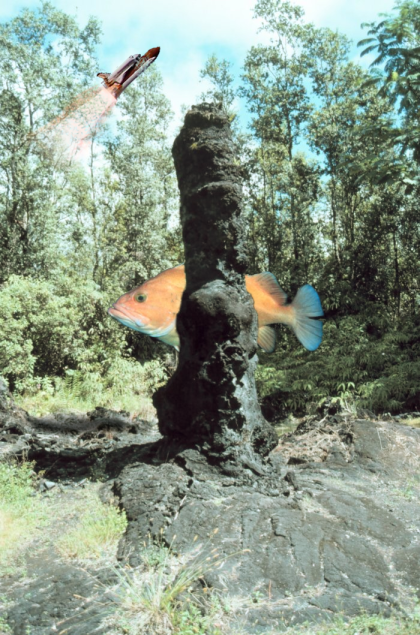
The completed collage